
The Honeywell 6000 Series, part of the FocusPRO line, offers programmable thermostats designed for efficiency and ease of use. Models like TH6110, TH6220, and TH6320 provide advanced features such as Wi-Fi connectivity, digital displays, and remote access. These thermostats are compatible with various HVAC systems, including heat pumps and zoning systems, ensuring precise temperature control and energy savings. With user-friendly interfaces and customizable scheduling, the Honeywell 6000 Series is ideal for balancing comfort and energy efficiency, making it a reliable choice for modern homes.
1.1 Overview of the Honeywell 6000 Series
The Honeywell 6000 Series, part of the FocusPRO line, is a range of programmable thermostats designed for efficiency and ease of use. These thermostats are compatible with various HVAC systems, including heat pumps, forced air, and zoned systems, offering precise temperature control and energy-saving capabilities. With features like Wi-Fi connectivity, digital displays, and remote access, the Honeywell 6000 Series provides advanced functionality for modern homes. Its user-friendly interface and customizable scheduling options make it ideal for balancing comfort and energy efficiency, ensuring optimal performance and reliability in different home environments.
1.2 Key Features and Benefits
The Honeywell 6000 Series offers advanced features like programmable scheduling, energy-saving modes, and compatibility with various HVAC systems. Models such as the TH6110, TH6220, and TH6320 provide Wi-Fi connectivity, digital displays, and remote access for enhanced control. The series supports heat pumps, forced air, and zoned systems, ensuring precise temperature regulation. Key benefits include energy efficiency, user-friendly interfaces, and customizable settings. Additional features like geofencing and smart recovery optimize performance and comfort. These thermostats are designed for reliability, ease of use, and seamless integration with modern home systems, making them a superior choice for balancing comfort and energy savings.
System Compatibility and Requirements
The Honeywell 6000 Series is compatible with various HVAC systems, including heat pumps, forced air, and zoned systems, operating on 24V AC for reliable performance.
2.1 Compatible HVAC Systems
The Honeywell 6000 Series thermostat is compatible with a wide range of HVAC systems, including forced air, radiant, and zoned systems. It supports heating, cooling, and heat pump configurations, making it versatile for various home setups. The thermostat works with 1-stage, 2-stage, and multi-stage systems, as well as dual-fuel configurations. It is also compatible with gas, electric, and oil-based systems, ensuring flexibility for different heating and cooling needs. Proper system matching is essential for optimal performance, so always verify compatibility before installation to avoid any issues.
2.2 Voltage and Wiring Requirements
The Honeywell 6000 Series thermostat operates on 24V AC and is compatible with most standard HVAC systems. It supports 2- to 8-wire configurations, depending on the system type. A common (C) wire is required for proper operation, especially for Wi-Fi models. Ensure the wiring matches the system requirements to avoid malfunctions. Always disconnect power before wiring to prevent electrical shocks or damage. Use the wiring diagram in the manual for precise connections. If unsure, consult a licensed electrician to ensure safe and correct installation. Proper wiring ensures optimal performance and prevents potential system issues. Verify compatibility before proceeding with installation.
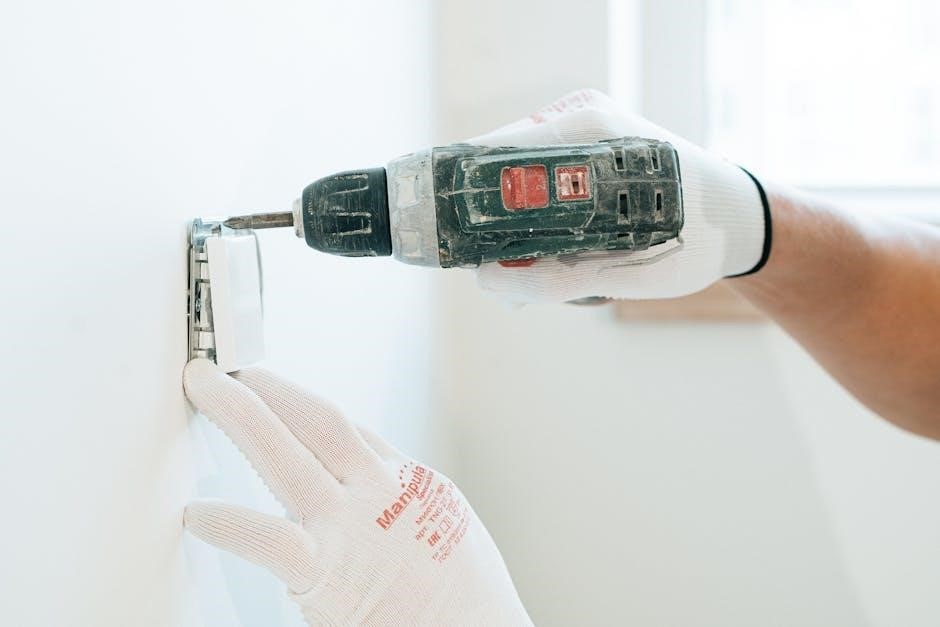
Tools and Materials Needed
Install the Honeywell 6000 Series thermostat with a screwdriver, pliers, wire strippers, and a voltage tester. Additional materials include mounting screws and wall anchors for secure installation.
3.1 List of Required Tools
To install the Honeywell 6000 Series thermostat, you will need specific tools to ensure a smooth and safe process. Start with a screwdriver, both Phillips and flathead, for removing the old thermostat and securing the new one. Pliers and wire strippers are essential for handling wires, especially if you need to strip or connect them. A voltage tester is crucial to verify that the power is off before starting work. Additionally, a level will help mount the thermostat straight, and a pencil can mark drill holes if needed. These tools ensure proper installation and prevent potential electrical hazards.
3.2 Additional Materials for Installation
Beyond the essential tools, several materials are needed for a successful installation. Wall anchors are required if you’re mounting the thermostat on drywall or another material that doesn’t support screws directly. Mounting screws are provided with the thermostat but may need reinforcement with anchors. If your existing wiring is outdated or incompatible, new wires may be necessary to ensure proper connections. Additionally, a reference card is included with the thermostat for quick access to operating instructions. These materials ensure a secure and professional installation, preventing potential issues and ensuring optimal performance of your Honeywell 6000 Series thermostat.
Pre-Installation Steps
Verify system compatibility and gather all necessary tools and materials before starting. Ensure the site is prepared, and power is disconnected to avoid delays during installation.
4.1 Verifying System Compatibility
Ensure the Honeywell 6000 Series thermostat is compatible with your HVAC system. It supports various heating, cooling, and heat pump configurations, including forced air, radiant, and zoned systems. Verify voltage requirements, as the thermostat operates on 24V AC and is compatible with most standard HVAC systems. Check wiring compatibility, as it supports 2- to 8-wire systems. Refer to the appendix for specific model compatibility, such as TH6110, TH6220, and TH6320 models. Proper system matching ensures optimal performance and avoids installation issues. Always confirm compatibility before proceeding with installation to guarantee a smooth setup and functionality.
4.2 Gathering Necessary Tools and Materials
To ensure a smooth installation of the Honeywell 6000 Series thermostat, gather all required tools and materials beforehand. You will need a screwdriver (both Phillips and flathead), pliers, wire strippers, and a voltage tester for safe working conditions. A level is recommended for proper mounting. Additional materials include mounting screws, wall anchors (if required), and potentially new wiring if your existing setup is outdated or incompatible. Always check the system compatibility before starting. Refer to the manual for specific requirements, as additional components may be needed based on your HVAC configuration. Ensure all tools are readily available to streamline the installation process.
Mounting the Thermostat
Mounting the Honeywell 6000 thermostat involves removing the wallplate and installing it on the wall, ensuring it is level and securely fastened. Attach the thermostat by aligning the mounting pins and snapping it into place. Insert the reference card into the wallplate for easy access to instructions. This step ensures a secure and professional installation, ready for wiring and configuration.
5.1 Removing the Old Thermostat
Before installing the new Honeywell 6000 thermostat, ensure the power to your HVAC system is turned off. Remove the wallplate from the old thermostat and gently pull it away from the wall. Carefully disconnect the wires from the old thermostat terminals, taking note of their colors and positions for later reference. Label the wires if necessary to ensure proper reconnection. Once all wires are disconnected, remove the old thermostat completely. Clean the area around the wallplate to prepare for the new installation. This step ensures a smooth transition to the new thermostat setup.
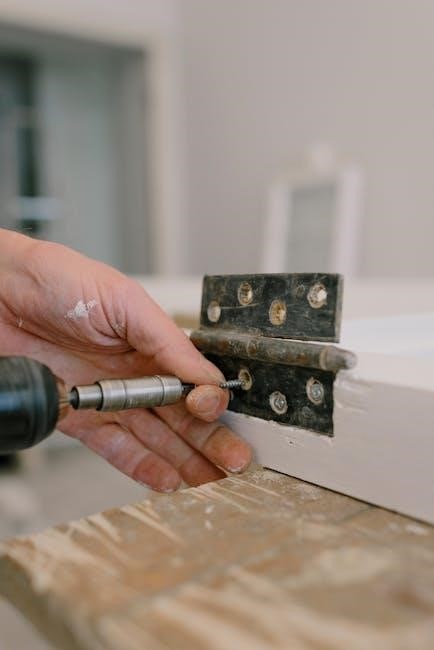
5.2 Installing the Wallplate
Installing the wallplate is a critical step for mounting the Honeywell 6000 thermostat. Begin by removing the wallplate from the new thermostat and pulling the wires through the wire hole. Position the wallplate on the wall, ensuring it is level, and mark the hole positions with a pencil. Drill holes at the marked locations and secure the wallplate using the provided screws or wall anchors. Make sure the wallplate is firmly attached to the wall to provide a stable base for the thermostat. The wallplate comes pre-assembled and is designed for easy installation, ensuring proper alignment and a professional finish.

Wiring and Connections
Wiring and connections are critical for proper Honeywell 6000 thermostat function. Always disconnect power before starting. Label wires from the old thermostat and connect them according to the wiring diagram provided in the manual to ensure accurate and secure connections.
6.1 Labeling and Connecting Wires
Properly label and connect wires to ensure safe and accurate installation. Before starting, disconnect power to the HVAC system to avoid electrical shocks. Remove the old thermostat and label each wire according to its function. Use the wiring diagram provided in the Honeywell 6000 manual to match each wire to the correct terminal on the new thermostat. Ensure all connections are secure to prevent loose wires, which can cause system malfunctions. If unsure about any connections, consult a licensed electrician or refer to the detailed instructions in the manual. Secure wiring ensures optimal performance and safety.
6.2 Ensuring Secure Connections
Secure connections are critical for reliable thermostat operation. Tighten all wire screws firmly to prevent loose connections, which can cause malfunctions. Double-check that each wire is connected to the correct terminal, as indicated in the wiring diagram. Use a voltage tester to confirm no power is present before handling wires. Avoid overtightening, which may damage terminals. If wires are frayed or damaged, replace them to ensure proper conductivity. Secure connections prevent errors, ensure accurate temperature control, and protect the system from potential damage. Refer to the manual for specific terminal assignments and torque specifications for a safe and efficient setup.
Safety Precautions
Always disconnect power before installation to avoid electrical shocks. Use a voltage tester to confirm no power is present. Prevent rapid compressor cycling to avoid damage. Ensure proper grounding and follow safety guidelines to protect the system and personnel during setup.
7.1 Disconnecting Power Before Installation
Disconnecting power before installation is critical for safety. Switch off the HVAC system at the circuit breaker or fuse box. Verify the thermostat’s power is off using a voltage tester. This prevents electrical shocks, injuries, and potential damage to the system. Always follow this step to protect yourself and the equipment during installation. Ensure no voltage is present at the thermostat wires before proceeding. This precaution is essential to avoid accidents and ensure a safe working environment. Proper power disconnection is the first and most important step in any thermostat installation process.
7.2 Avoiding Compressor Cycling Damage
Avoiding compressor cycling damage is crucial for HVAC system longevity. Rapid compressor start-stop cycles can cause mechanical stress, leading to premature wear and potential failures. Proper installation and configuration of the Honeywell 6000 thermostat help prevent frequent cycling. Follow the manufacturer’s wiring and setup guidelines to ensure smooth operation. Incorrect settings or wiring can disrupt normal compressor function, reducing efficiency and lifespan. Always refer to the manual for cycle timing recommendations and system compatibility to protect your equipment. Proper installation ensures the compressor operates within safe parameters, minimizing damage risks and extending its service life effectively.
Configuring the Thermostat
Configure the Honeywell 6000 thermostat by accessing installer functions to set system parameters. Power up the device, allow system recognition, and navigate through menu options for configuration.
8.1 Accessing Installer Functions
To access installer functions on the Honeywell 6000 Series thermostat, power up the device and allow it to complete the initial system recognition. Navigate through the menu options to reach the installer settings. These functions enable configuration of essential system parameters such as system type, heat/cool modes, and emergency heat options. Use the provided reference guide to understand each parameter and select the appropriate settings for your HVAC system. Proper configuration is critical for optimal performance and compatibility with your heating and cooling equipment. Once configured, save the settings to ensure proper operation.
8.2 Setting System Parameters
Setting system parameters on the Honeywell 6000 Series thermostat involves configuring options like system type, heat/cool modes, and emergency heat settings. Access these through the installer functions menu. Use the reference guide to understand each parameter and select settings matching your HVAC system. Proper configuration ensures optimal performance and compatibility. After setting parameters, save them to apply changes. Advanced features like geofencing can be configured separately. Follow on-screen instructions carefully to avoid errors and ensure efficient system operation. Consult the manual or a professional if unsure about any settings.

Advanced Configuration Options
The Honeywell 6000 Series offers advanced features like custom scheduling, geofencing, and adaptive recovery. These options enhance energy efficiency and system performance, tailored to your needs.
9.1 Programming Custom Schedules
Programming custom schedules on the Honeywell 6000 Series allows you to tailor temperature settings to your daily routine, optimizing comfort and energy efficiency. The thermostat supports up to four periods per day, enabling you to set specific temperatures for wake, leave, return, and sleep times. Use the touchscreen interface to adjust these settings, ensuring your home is heated or cooled only when needed. The scheduler integrates seamlessly with smart features, such as geofencing, to enhance automation. Custom schedules can be saved and repeated weekly, providing consistent control over your HVAC system. This feature reduces energy waste and ensures optimal performance.
9.2 Enabling Smart Features
Enabling smart features on the Honeywell 6000 Series enhances your thermostat’s functionality. Start by accessing the advanced settings menu and selecting “Smart Features.” Enable Wi-Fi connectivity to link the thermostat to your home network. Once connected, download and install the Honeywell app to control settings remotely. Features like geofencing and smart recovery can be activated to optimize energy use based on your location and schedule. Additionally, enable energy usage reporting to monitor and adjust your consumption. These features integrate seamlessly with voice assistants like Amazon Alexa or Google Home for hands-free control. Enabling smart features ensures enhanced efficiency and convenience.
Troubleshooting Common Issues
Identify and resolve common issues like error codes, connectivity problems, or sensor malfunctions. Always check power supply, wiring connections, and sensor accuracy. Consult the manual for detailed solutions.
10.1 Identifying Error Codes
The Honeywell 6000 Series thermostat displays error codes to indicate specific issues. These codes, such as “E1” or “E2,” relate to problems like sensor malfunctions, wiring issues, or system incompatibility. Always check the thermostat’s display for any error messages and refer to the manual for code explanations. Addressing these codes promptly ensures optimal performance and prevents further damage. For example, temperature sensor errors may require cleaning or replacing the sensor, while wiring issues might need professional assistance. Regularly reviewing error codes helps maintain system efficiency and longevity.
10.2 Resolving Connectivity Problems
Connectivity issues with the Honeywell 6000 Series thermostat can often be resolved by checking wiring and network settings. Ensure all wires are securely connected and match the wiring diagram in the manual. For Wi-Fi models, reboot the thermostat and router, then re-enter network credentials. Verify the network name and password are correct. If issues persist, use a multimeter to test wire continuity or check for firmware updates. Resetting the thermostat to factory settings may also resolve connectivity problems. Always refer to the troubleshooting guide in the manual for specific error code solutions and follow step-by-step instructions to restore connectivity and ensure proper system operation.

Maintenance and Upkeep
Regularly clean the display and check battery levels to ensure optimal performance. Verify wiring connections are secure and update firmware periodically for enhanced functionality and efficiency.
11.1 Cleaning the Display
Cleaning the Honeywell 6000 Series thermostat display is essential for maintaining clarity and functionality. Power off the device before cleaning to prevent damage. Use a soft, dry cloth to gently wipe away dust or smudges. For stubborn marks, dampen the cloth with mild soap and water, but ensure it is not soaking wet to avoid moisture damage; Avoid using harsh chemicals or abrasive materials, as they may scratch the screen. After cleaning, inspect the display to ensure all marks are removed and visibility is restored; Regular cleaning helps maintain optimal performance and user experience.
11.2 Checking Battery Levels
Regularly checking the battery levels of your Honeywell 6000 Series thermostat ensures uninterrupted operation. Locate the battery compartment, usually at the back or bottom of the device. Open it and inspect the batteries for corrosion or wear. Use the thermostat’s menu to check battery voltage, typically found under system settings or diagnostics. Replace batteries when the voltage drops below the recommended level, usually indicated by a low-battery alert on the display. Use high-quality, alkaline batteries of the specified type (e.g., AA or AAA) to maintain performance. Avoid mixing old and new batteries to prevent power imbalances.
Regular Inspections
Regularly inspect the Honeywell 6000 Series thermostat to ensure optimal performance. Check wiring connections for security and corrosion, and verify firmware updates for the latest features and fixes.
12.1 Verifying Wiring Connections
Regularly inspect the wiring connections of your Honeywell 6000 Series thermostat to ensure reliability. Turn off the power supply before checking for loose or corroded wires. Use a multimeter to verify wire continuity and proper voltage. Cross-reference the wiring diagram in the manual to confirm correct terminal connections. Check for any signs of wear or damage, such as frayed wires or loose screws. If issues are found, tighten connections or replace damaged wires as needed. This step ensures optimal performance and prevents malfunctions. Always refer to the manual for specific wiring configurations or contact a professional if unsure.
12.2 Updating Firmware
Regular firmware updates are essential to maintain the Honeywell 6000 Series thermostat’s optimal performance. Visit Honeywell’s official website to download the latest firmware version. Before updating, ensure the thermostat is powered off to prevent interruptions. Use a USB drive to transfer the update file, following the instructions provided in the manual. The update process enhances functionality, adds new features, and resolves potential issues. After completing the update, restart the thermostat to apply changes. Always use firmware approved by Honeywell to ensure compatibility and reliability. Regular updates help keep your thermostat running smoothly and efficiently.
The Honeywell 6000 Series thermostat offers successful installation, optimal performance, and energy efficiency, ensuring comfort and reliability while maintaining the manufacturer’s warranty and safety standards.
13.1 Summary of Key Steps
Installing the Honeywell 6000 Series thermostat involves verifying system compatibility, gathering tools, and following safety guidelines. Start by disconnecting power and removing the old thermostat. Mount the wallplate securely, ensuring it is level and properly fastened. Connect wires carefully, referencing the wiring diagram in the manual. Configure system settings and advanced features like scheduling and smart options. Ensure all connections are secure to prevent malfunctions. Regular maintenance, such as cleaning the display and checking battery levels, is essential for optimal performance. Always refer to the manual for troubleshooting and updates to ensure a safe and efficient setup.
13.2 Final Tips for Optimal Performance
To ensure the Honeywell 6000 Series thermostat performs optimally, maintain regular maintenance routines. Clean the display gently to preserve visibility and check battery levels to prevent system malfunctions. Verify wiring connections are secure and update firmware periodically for enhanced functionality. Program custom schedules and enable smart features to maximize energy efficiency. Refer to the manual for troubleshooting common issues and resolving connectivity problems. Schedule periodic inspections to ensure all components are in good condition. By following these tips, you can extend the thermostat’s lifespan, maintain consistent heating and cooling performance, and enjoy a comfortable, energy-efficient home environment.